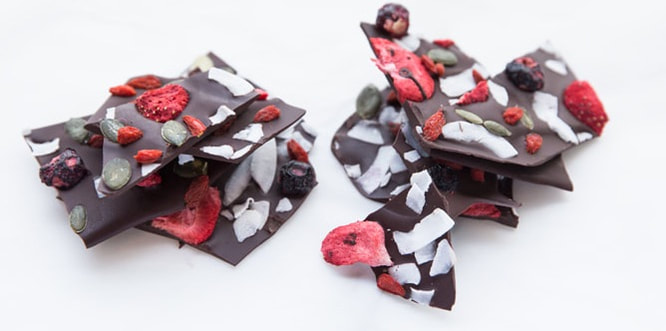
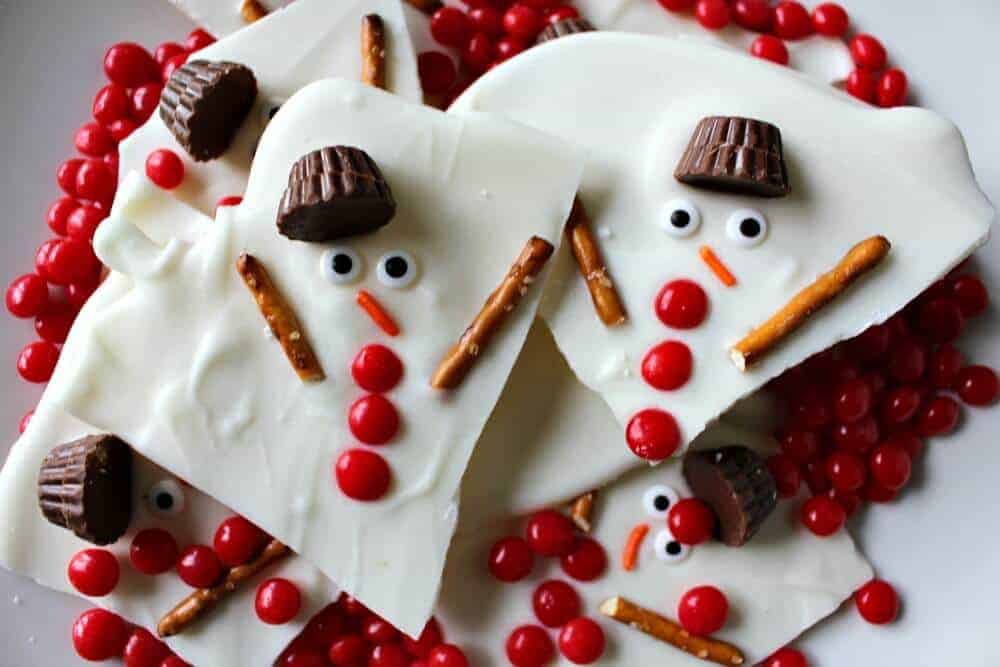
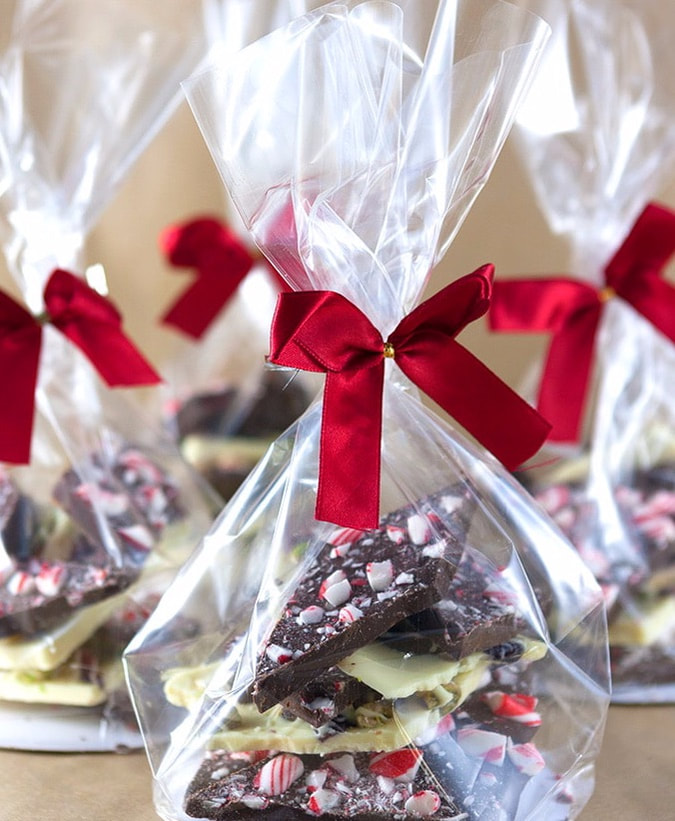
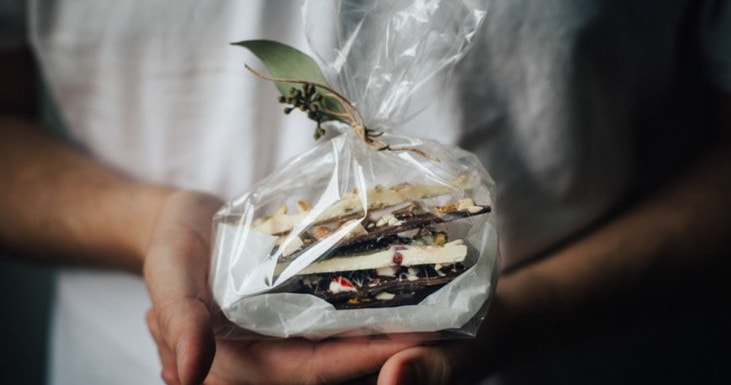
 This year we will have a bit of extra time on our hands so we've decided to make a few batches of chocolate bark to give away to friends and family. You can too! Just follow this quick and easy process. WHAT IS THE BEST KIND OF CHOCOLATE TO USE FOR BARK? Many recipes on the internet may suggest using regular chocolate chips as the primary ingredient, but this is a misguidance for good chocolate bark. Although chocolate chips are affordable and readily available, using them can be problematic because of the additives. They are manufactured to hold their shape, so they aren’t ideal for melting. Look for higher quality chocolate with a few simple ingredients on the label. TOPPINGS FOR CHOCOLATE BARK The possibilities are truly endless, but here are some popular choices. Be creative as you want because, really, what doesn’t taste good with chocolate??
Ingredients 10-12 ounce 50% milk chocolate - 70% dark chocolate, depending on your preference + toppings of your choice Instructions Line a baking sheet with parchment paper. Place two-thirds of the chocolate in a microwave safe bowl. Microwave on high in 15-30 seconds intervals, stirring each time, until chips are completely melted. This will take about 2 minutes total, but watch carefully the last 45 seconds. Add the remaining one-third of chocolate and stir to combine and melt. Continue to stir until all the chocolate is melted, smooth, and glossy. Don't be tempted to put it back in the microwave to finish melting added chocolate. Let it sit a minute and stir again. It will eventually melt from the residual heat. The benefit of "tempering" chocolate in this way is to give it shiny sheen. Chocolate that isn’t melted properly will be dull looking, streaky, or grainy. It will also be firm, break off with a snap, and hold it’s shape. Pour melted chocolate on prepared baking sheet. Use an offset spatula to spread chocolate to about 1/4" thick. Immediately sprinkle on desired toppings. Allow chocolate to set and harden on counter. Do not break into pieces until chocolate is completely set, about 2-3 hours. Once the chocolate is set completely and broke into pieces, store in an airtight container, or separate gift packages, in a cool, dry place, ideally less than 70ºF/21ºC. Properly tempered chocolate will keep for several weeks and doesn't need to be refrigerated. If you have to store it in the refrigerator, make sure it's in a sealed container to prevent moisture, smells, or condensation spoiling the chocolate.
0 Comments
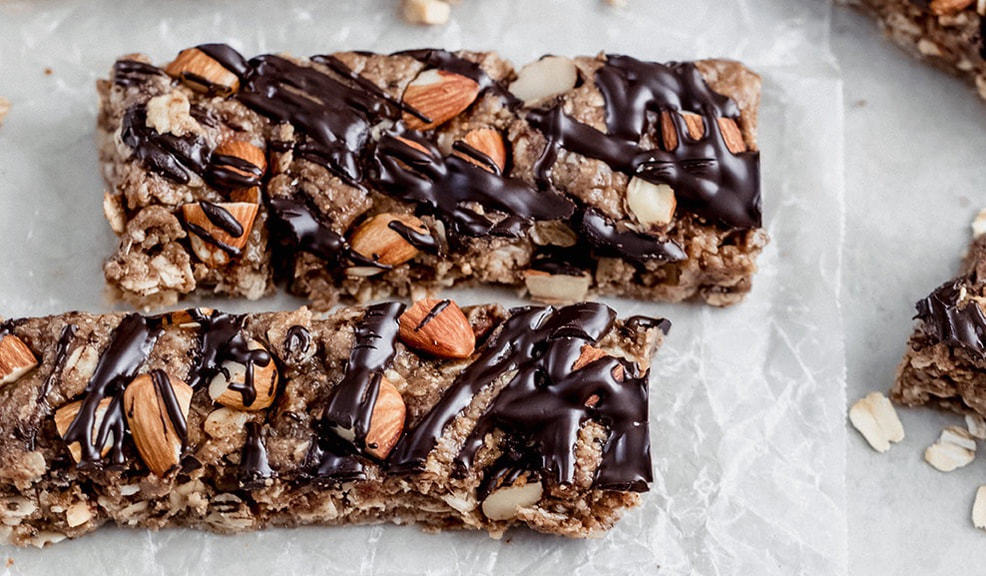 The base of the recipe: Nut butter: we’re all about the healthy fats! We like to use an all natural peanut butter (just peanuts + salt). If you would like to switch it up, you could try almond butter, cashew, pecan or even sunflower seed butter for a nut free version. Honey: naturally sweetened and just the way we like it - no refined sugar. We love using Bermondsey Street Bees award winning raw honey because if it’s healing properties, and it's absolutely delicious! Flaxseed meal: a natural source of protein, fiber and vitamins. Chia seeds: another great source of fiber and protein. Oats: a wonderful complex carb to help provide you with energy. INGREDIENTS 1 cup creamy natural drippy peanut butter (just peanuts & salt) 3 tablespoons virgin coconut oil or butter 6 tablespoons honey 2 teaspoon vanilla extract 1 teaspoon cinnamon 2/3 cup flaxseed meal 2 tablespoon chia seeds 1 cup old fashioned rolled oats, gluten free if desired 2/3 cup roasted almonds, roughly chopped 1/2 cup unsweetened shredded coconut For on top: 4 tablespoons roasted almonds, roughly chopped 4 tablespoons dark 70% chocolate 1 teaspoon coconut oil or butter INSTRUCTIONS Roast the almonds in the oven on a baking sheet at 350F/175C for 7-10 minutes. Set aside to cool. Roughly chopped or pulse a few times in a food processor. Don't leave big pieces or the granola bars won't bind together. In a separate medium saucepan, add peanut butter, coconut oil, honey, vanilla and cinnamon and cook over low heat. Stir every so often until the mixture is smooth and creamy. Do no boil. Remove from heat and immediately stir in flaxseed meal, chia and oats. Fold in chopped almonds and shredded coconut and stir until combined. Line an 8x8 inch pan with parchment paper; pour granola bar mixture in and spread out evenly, then press down in the pan very firmly. Press remaining roasted almonds on top. Slowly melt dark chocolate and 1 teaspoon coconut oil, stirring until chocolate is completely smooth and melted. Drizzle diagonally over bars. Cover the bars, and place bars in the fridge for a few hours or preferably overnight. Remove bars from pan and cut into 16 granola bars anyway you'd like. Store bars in the fridge or freezer, which ever you prefer. Now these chewy granola bars will be your new favourite grab-and-go snack too! 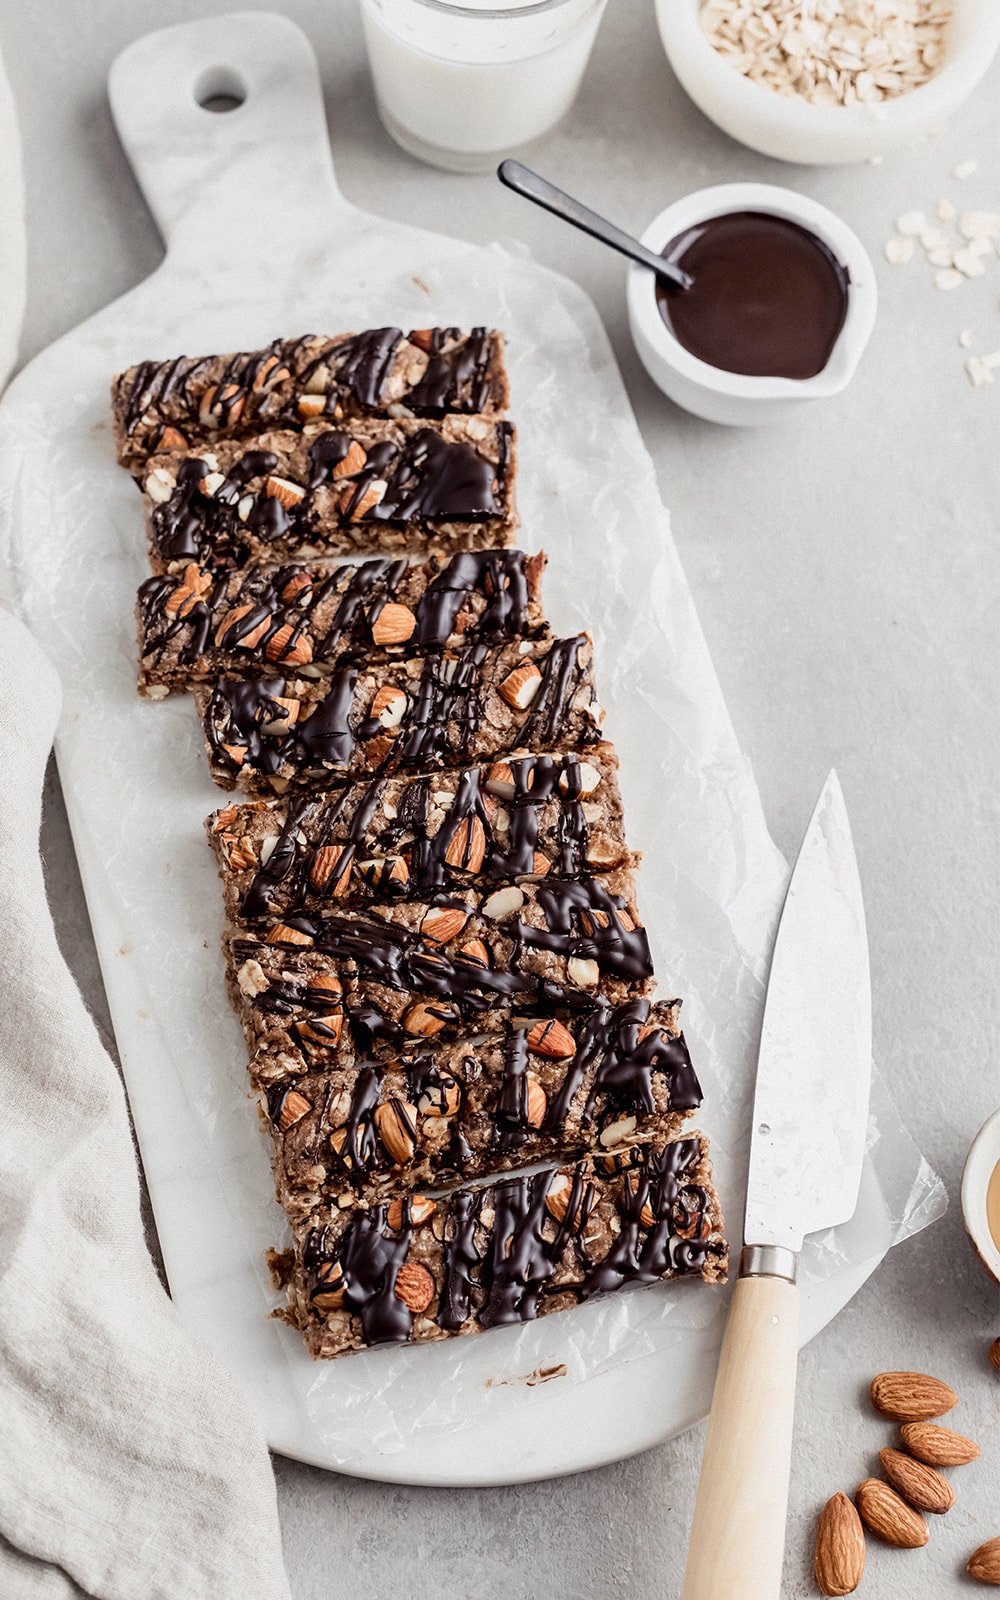 Thanks to Ambitious Kitchen for this great recipe and photos.
 I love the holiday season. For me, it brings back fond memories of making sweets with my family and friends. Many of our current creations have evolved from recipes that I made as a child growing up in Canada. If you look at the label on the back of our brittle and toffee, you will notice that I always add, my signature touch of organic Canadian maple syrup. Maple syrup is the perfect natural sweetener - adding warmth and a depth of flavour that you don't get with refined sugars.
Here is my favourite recipe inspired by 'Canada Living' for maple fudge. Ingredients 2 cups packed unrefined brown cane sugar 1 cup whipping cream (35%) 1/2 cup pure organic maple syrup 2 tablespoons butter cut in small pieces 1 teaspoon natural vanilla extract 1/2 cup roast walnuts or pecans (optional) To start, grease the sides of heavy saucepan. Add sugar, cream, maple syrup, and butter; cook over medium heat, stirring constantly with wooden spoon, until boiling. Ensure that the sugar melts completely before allowing the pot to boil or your fudge will be gritty. Boil, without stirring, until candy thermometer reaches 114C, or soft-ball stage (when 1/2 tsp syrup dropped into very cold water forms soft ball that flattens when removed from water), about 8 minutes. Immediately pour into greased wide bowl, without scraping pan clean. Let cool on rack to 38C, 1 to 2 hours. With wooden spoon, beat in vanilla until mixture is very thick and most of the gloss disappears, about 7 minutes. (Or use heavy-duty mixer with paddle attachment and beat at medium-low speed for about 8 minutes.) Add nuts if you fancy. Immediately scrape into parchment paper–lined 2 L square baking dish; smooth top. Let cool on rack. Lift out onto cutting board; cut into squares. Enjoy! Happy holidays from our family to yours. x 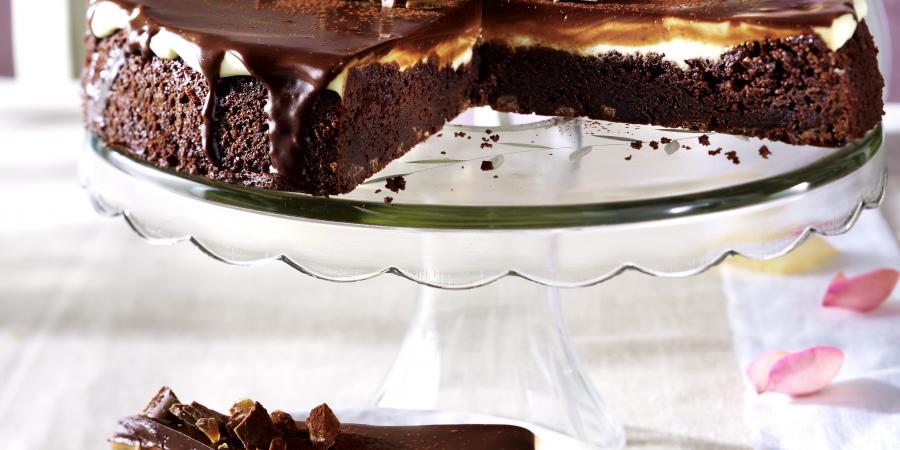 We love this delicious decadent dark chocolate dessert topped with our Coffee Toffee Crunch or Almond Toffee Crunch.
Ingredients 100 g butter 225 g dark chocolate, coarsely chopped 200 g toffee, coarsely chopped 75 g flour 160 g unrefined brown sugar 35 g organic cocoa powder + 1 1/2 tsp for decoration 1 tsp baking powder 1/2 tsp vanilla extract or ground espresso 3 medium eggs, beaten 100 ml crème fraîche 250 ml whipping cream 125 ml double cream 1 tbsp coconut oil Preheat the oven to 350°F/180°C. Grease a 10 inch springform cake pan and dust with flour. Melt the butter with 1/2 the chocolate over low heat then allow to cool. Sift the flour, baking powder, 1/3 cup cocoa powder and sugar together. Combine the vanilla extract with the eggs and mix into the flour and sugar to create a batter. Drizzle the chocolate butter into the mixture, stirring. Next, mix in the crème fraîche. Pour the cake mixture into the pan and smooth the top with a large knife. Bake for 8-10 minutes. Remove from the oven and sprinkle 1/3 of the chopped toffee evenly over the top. Return to the oven and bake for another 17-20 mins. Remove the cake from the oven, loosen the sides of the cake pan and place on a wire rack to cool. When the cake has cooled thoroughly, transfer it to a plate. Spread the whipped cream over the top of the cake and refrigerate for 30 mins. Meanwhile, heat the remaining cream in a small saucepan over low heat with the rest of the dark chocolate and the coconut oil, stirring until the chocolate has melted. Remove from the heat and allow to cool. Remove the cake from the refrigerator and spread the chocolate mixture evenly over the cake. Return the cake to the refrigerator for 1 hour. When ready to serve, sprinkle the cake with the rest of the chopped toffee and a little cocoa powder. 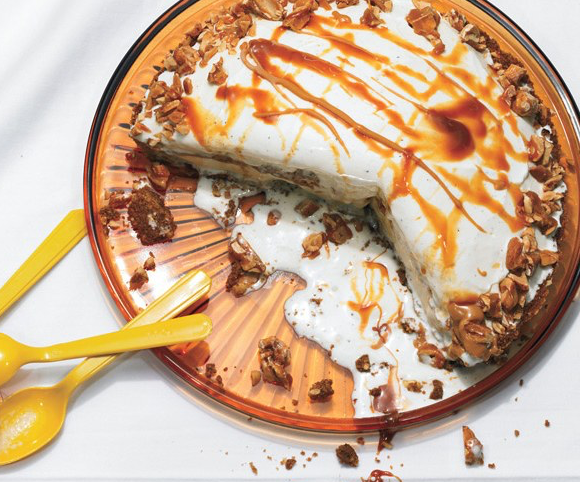 Looking for a way to cool off with these hot summer temps? This decadent ice cream pie has quickly become a favourite dessert at our house. Caramel Sauce 3/4 cup whipping cream 1/2 vanilla bean, split lengthwise 2 tablespoons unsalted organic butter 1/4 teaspoon fine sea salt 3/4 cup unrefined cane sugar 1/3 cup water 1/4 cup maple syrup Pie 9-10 digestive cookies, chocolate wafers, or graham crackers 1/4 cup (packed) unrefined dark brown cane sugar 5 tablespoons unsalted organic butter, melted, hot 1 1/2 teaspoons pure vanilla extract 1/2 cup roasted peanuts 1 1/2 L premium vanilla ice cream, slightly softened (3 x 500ml tubs) 5 tablespoons natural creamy peanut butter 1 cup of your favourite brittle Caramel sauce Place cream in small saucepan. Scrape in seeds from vanilla bean; add bean. Bring just to simmer. Mix in butter and sea salt; set vanilla cream aside. Stir sugar, 1/3 cup water, and maple syrup in heavy medium saucepan over medium heat until sugar dissolves. Increase heat; boil without stirring until syrup turns deep amber, brushing down sides with wet pastry brush and swirling pan occasionally, about 12 minutes. Remove from heat. Whisk in vanilla cream (mixture will bubble). Set sauce aside. Ice Cream Pie Preheat oven to 190°C/375°F. Line 9-inch-diameter pie dish with foil. Finely grind cookies and brown sugar in processor. Add butter and vanilla; blend until moist crumbs form. Add nuts; blend just until finely chopped. Using plastic wrap as aid, press crumbs firmly onto bottom and up sides of foil-lined pie dish. Freeze 15 minutes. Bake crust until brown, about 15 minutes. Freeze 1 hour. Using foil, lift crust from dish; carefully peel off foil. Return crust to pie dish. Drizzle 1/2 cup caramel sauce over bottom of crust. Freeze 30 minutes. Spoon 1 1/2 pints ice cream into crust; smooth top. Drizzle 3 tablespoons peanut butter over, then 2 tablespoons sauce. Sprinkle with 1/2 cup brittle. Freeze 1 hour. Spoon remaining 1 1/2 pints ice cream over; smooth top. Drizzle 2 tablespoons peanut butter over, then 2 tablespoons sauce. Sprinkle edge of pie with 1/2 cup brittle. Freeze 4 hours. DO AHEAD Pie can be made 3 days ahead; tent with foil or lid and freeze. Cover and chill remaining sauce. To serve, cut pie into wedges. Rewarm sauce and pass separately. This recipe works well with salted caramel, butter pecan, or dark chocolate ice cream. I've also used coffee ice cream and topped it with our coffee toffee crunch. 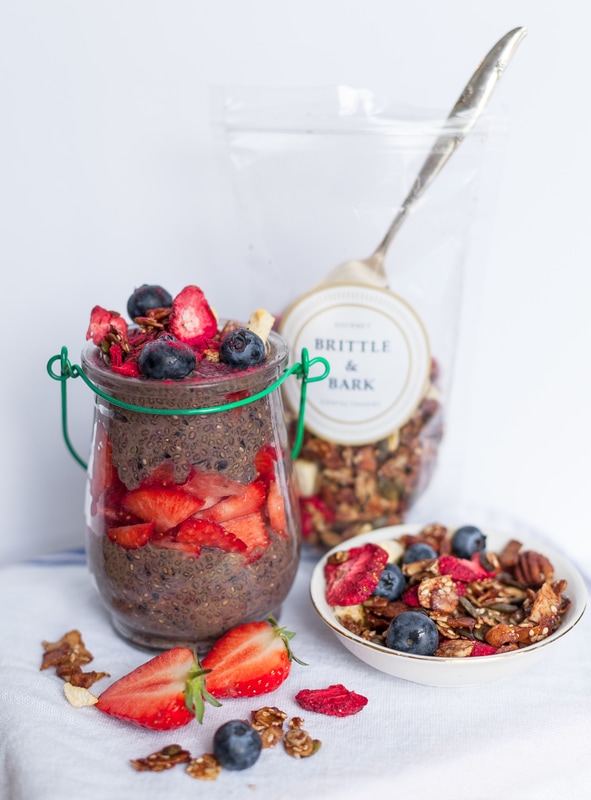 We've just made mornings a little better! Introducing Cocoa Nola our grain and refined sugar free, cocoa infused granola. We love it with milk, on greek yogurt or topped on home made chia seed pudding. Chocolate Chia Seed Pudding 1/2 cup unsweetened almond milk 3 tbsp chia seeds 1 cup blueberries 1 cup strawberries 1/4 tsp organic cocoa 1/4 tsp local organic honey or maple syrup Blend almond milk with blueberries and honey (in a mixer). Then add chia seeds and tie it manually, removing all clumps Put it in a fridge, covered with cling film or a cover, and let it stay at least for a couple of hours. Remove from the fridge, serve with fresh berries and Cocoa Nola granola. This delicious creation is well suited for breakfast or a portable mid-afternoon snack filled with healthy fats, omega 3s and protein. 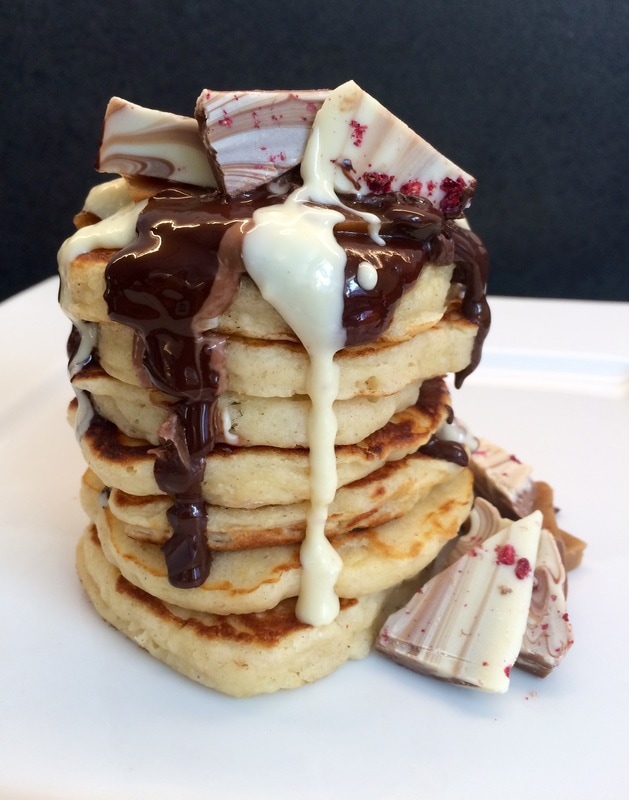 This was my favourite day growing up because we would have pancakes for dinner! I've tried many recipes over the years but this one is the best. The pancakes are light, fluffy and best of all - there is no added sugar. This makes them a great base for so many delicious toppings. For something decadent you can top them with marbled bark, buttery toffee and melted chocolate as in the photo above. Or for something a bit more traditional, try pairing them with caramelised banana, brittled nuts and maple syrup. Either way they are delicious!!
Brittle & Bark pancake recipe 1 1/2 cups flour 3/4 tsp baking powder 3/4 tsp baking soda 3/4 tsp salt 3/4 cup plain yogurt 3/4 cup milk 2 eggs 1/4 cup melted butter 1/2 tsp vanilla or maple extract (optional) Combine all the dry ingredients in a bowl and mix well. Beat the eggs, yogurt and milk together in a separate small bowl. Add melted butter to the liquid ingredients, stirring constantly with a whisk to blend. Pour the mixture into the dry ingredients and stir just enough to moisten the flour mixture. Do not over mix. It should look a little lumpy. If you overwork the mixture, the pancakes will be tough. Let batter sit for 5-10 minutes. Heat a griddle or nonstick pan over medium heat and coat it with a couple of drops of oil. Drop the batter from a large spoon (about 1/4 cup) and cook until the first side is golden brown, or until the top surface bubbles and is dotted with holes. Flip and cook until the other side is golden brown. This happens quickly so peek after 30 seconds and watch carefully! Adjust the heat setting if necessary. It's best to cook them slow so that they crisp up and don't burn. Wipe the griddle totally clean with a paper towel between batches. Serve immediately with your favourite Brittle & Bark toppings. |